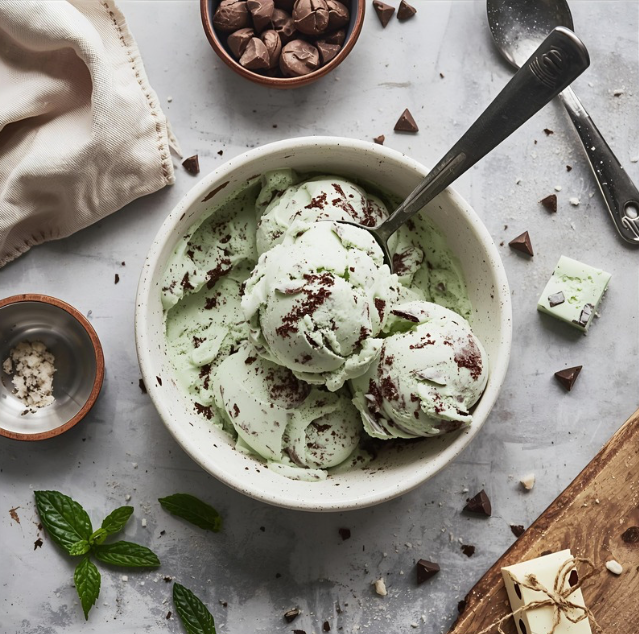
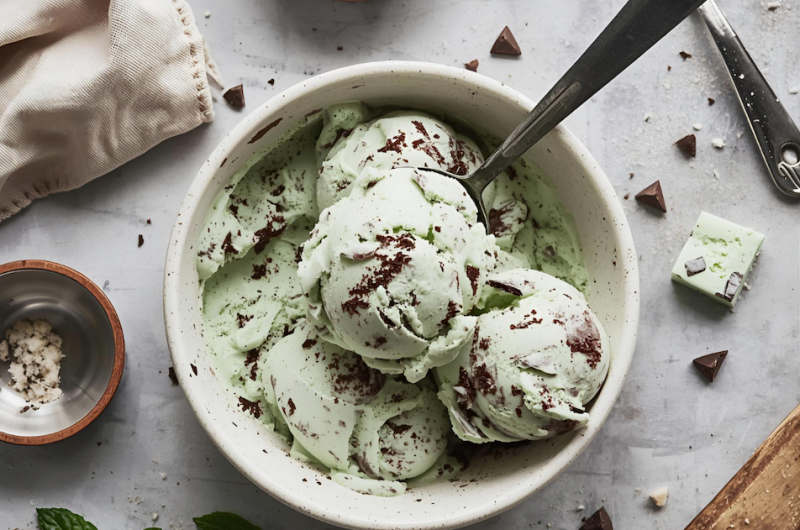
This is a family favourite in our house – it is creamy, delicious, not in the slightest bit icy, and 100% dairy free. It is full of premium ingredients that are used in commercial vegan ice creams, and these give it a taste, texture, and melting point to rival any store bought ice cream (dairy or not!). I have given this to vegans and non-vegans and everyone has loved it. It is great in a sundae or in a homemade gluten free ice cream cone.
Making vegan ice cream that’s creamy, scoopable, and stable needs careful balancing of the ingredients, because each plays a specific role. Sugar controls (obviously!) sweetness and melting point. Dextrose lowers the relative sweetness and depresses freezing point more, which helps to keep the ice cream soft. Maltodextrin adds body and a smooth mouthfeel without adding sweetness, and it reduces iciness. The fats give that creamy mouthfeel, and the emulsifiers keep the mix of fats and liquid stable. The gums prevent ice crystals, improve scoopability, extend shelf-life, and help to give the ice cream body, and the silk gel also improves texture and mouthfeel. You can substitute some ingredients out (for instance you could try coconut oil instead of the cocoa butter and sunflower oil), but results wouldn’t be guaranteed.
It does take a bit of organisation, therefore, to get the ingredients together, but it is pretty much foolproof. We have an ice cream maker with a compressor like this one, because we aren’t quite organised to make sure we have a bowl frozen when we need it (there’s lots of ADHD. ADD, and autism going on in this household!). But these recipes would work with a household ice cream maker.
In our house we do love playing with natural colourants, but because I wanted a vibrant green/turquoise without any additional flavours (like you might get with matcha or spirulina) I opted for a vegan water soluble paste food colouring. Of course, you don’t need to colour it at all if you don’t want to use it, the mint taste shines through anyway. We also like to make our own chocolate chips/chunks because you can add some coconut oil and this makes the chocolate pieces less brittle when you bite into them.
In order to get the measurements correct I recommend using a scientific scale such as this for the gums and emulsifiers. They are inexpensive and avoid you a) wasting money on gums that are used up too quickly, and b) having too much gum in the mix which can impact the mouthfeel of the ice cream. We also recommend storing it in these tubs as they fit one batch of mix in perfectly, and they are long and thin which is good news when you are scooping the ice cream out (by the way, this is our favourite scoop as it is very heavy duty and easy to heat up in a cup of hot water to make scooping that bit easier!). You will also need a thermometer whether it is a candy thermometer, a digital probe thermometer, or an infa-red thermometer such as this one.
We are all in the UK, and get our additives from Amazon or directly from Speciality Ingredients online. UK links are here:
Recipe Steps:
- Get all of your wet ingredients (soy milk, cocoa butter, and sunflower oil) in the pan melting at a low heat.
- Weigh out your sugar, dextrose and maltodextrin on your main kitchen scales. Measure out the guar gum, locust bean gum, sunflower lecithin, sucrose ester, silk gel (if using) and salt. Whisk all the dry ingredients together.
- Add them to the warmed wet mixture and whisk.
- Heat up until it reaches 85 degrees celsius (185 fahrenheit). Blend with a stick blender and leave to cool. Whisk in the peppermint extract (you might want to add a little, taste, and repeat until you are happy, as peppermint extracts vary in strength). Add food colouring if using.
- Refrigerate to allow the gums to fully hydrate, preferably overnight.
- Meanwhile prepare your chocolate chunks if you are making your own – melt the cocoa butter with the coconut oil in the microwave. Be careful to heat on short bursts of 10-15 seconds and then stir. Remove when there are still some solids – the residual heat will melt those. Add the sifted cocoa powder, icing sugar, salt, and vanilla extract and mix well until it is fully combined and there are no lumps.
- Leave to cool slightly and when the mixture has thickened up either put it in a piping bag to make chocolate drops (this is quite time consuming so I tend to not opt for this!) or spread it out onto a sheet. Refrigerate until hardened, and chop into chunks. Place these in the freezer until the ice cream, is ready as they are not tempered and therefore will likely not hold shape at room temperature.
- Churn the ice cream. In the last few minutes of churning add in the chocolate chips/chunks. Spoon into an ice cream container and freeze for several hours to fully harden up.
- Serve and enjoy!!!
This post may contain affiliate links. As an Amazon Associate, I earn from qualifying purchases. I only recommend products I use and trust. If you would like to support this blog in a different way then we would appreciate you buying us a coffee as this allows us to continue making content for you.
Mint Chocolate Chip Ice Cream Vegan & Gluten Free
Course: DesertDifficulty: Intermediate10
servings30
minutes247
kcalIngredients
- Wet Ingredients
550g Unsweetened Soy Milk
50g Cocoa Butter (deodorised)
50g Sunflower oil
- Dry Ingredients
110g Sugar
40g Maltodextrin
60g Dextrose
1.2g Guar Gum
1.2g Locust Bean Gum
2.5g Sunflower lecithin (powdered)
2.5g Sucrose esters (optional – use 5g of lecithin if you don’t have this)
2.5g Silk Gel (optional)
2g Himalayan Pink Salt
1tsp Peppermint extract
125g chocolate chips (if using store bought)
- Homemade chocolate chips (makes 2 batches)
100g cocoa butter
10g coconut oil
80g icing sugar
60g cocoa powder
pinch salt
1/2 tsp vanilla essence
Directions
- Get all of your wet ingredients (soy milk, cocoa butter, and sunflower oil) in the pan melting at a low heat.
- Weigh out your sugar, dextrose and maltodextrin on your main kitchen scales. Measure out the guar gum, locust bean gum, sunflower lecithin, sucrose ester, silk gel (if using) and salt. Whisk all the dry ingredients together.
- Add them to the warmed wet mixture and whisk.
- Heat up until it reaches 85 degrees celsius (185 fahrenheit). Blend with a stick blender and leave to cool. Whisk in the peppermint extract (you might want to add a little, taste, and repeat until you are happy, as peppermint extracts vary in strength). Add food colouring if using.
- Refrigerate to allow the gums to fully hydrate, preferably overnight.
- Meanwhile prepare your chocolate chunks if you are making your own – melt the cocoa butter with the coconut oil in the microwave. Be careful to heat on short bursts of 10-15 seconds and then stir. Remove when there are still some solids – the residual heat will melt those. Add the sifted cocoa powder, icing sugar, salt, and vanilla extract and mix well until it is fully combined and there are no lumps.
- Leave to cool slightly and when the mixture has thickened up either put it in a piping bag to make chocolate drops (this is quite time consuming so I tend to not opt for this!) or spread it out onto a sheet. Refrigerate until hardened, and chop into chunks. Place these in the freezer until the ice cream, is ready as they are not tempered and therefore will likely not hold shape at room temperature.
- Churn the ice cream. In the last few minutes of churning add in the chocolate chips/chunks. Spoon into an ice cream container and freeze for several hours to fully harden up.
- Serve and enjoy!!!
Please comment if you try the recipe, I would love to connect and see how it went, and if you would like to see other flavours of ice cream then comment below.